Connecting PS4 controller to Raspberry Pi via Bluetooth
You're probably here because you tried to pair your PS4 controller to the Pi but faced some problems, I did too. Here's a summary of my journey into getting my PS4 Controller paired to Raspberry Pi 4.
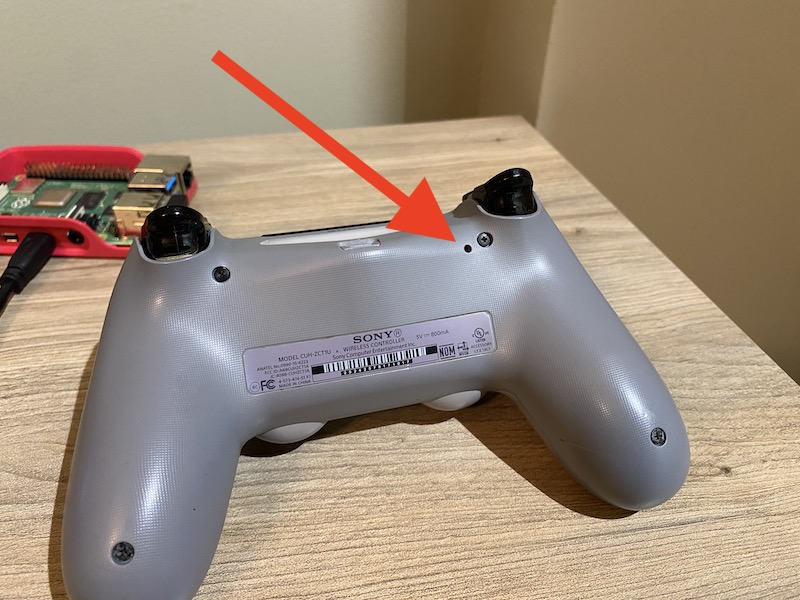
I recommend resetting your controller before starting this tutorial. Resetting will just help us with a fresh start.
To reset find the tiny hole on the back of your controller, insert a tiny pin or needle then push and hold for 5 seconds.
Before installing anything let us ensure your Raspberry Pi is up to date. Run those commands to do so:
sudo apt-get update
sudo apt-get upgrade
Install the joystick package which includes some applications and gamepads support for Linux. Most Raspberry Pi has this package pre-installed but run this command just in case.
sudo apt-get install joystickI will talk about 4 different ways to connect your PS4 controller
GUI
bluetoothctl
USB cable connection
Using GUI to connect
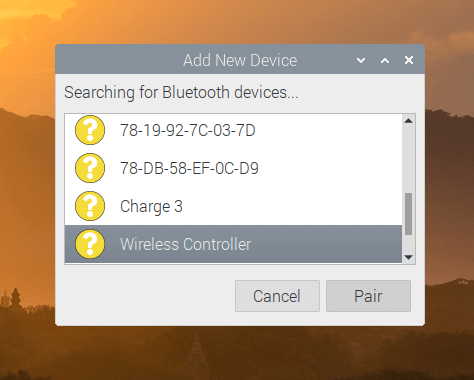
Graphical User Interface. On your Raspberry Pi top right corner of the screen click on the Bluetooth icon > Add Device.. A new popup should appear and start scanning nearby Bluetooth devices.
Click Wireless Controller then Pair
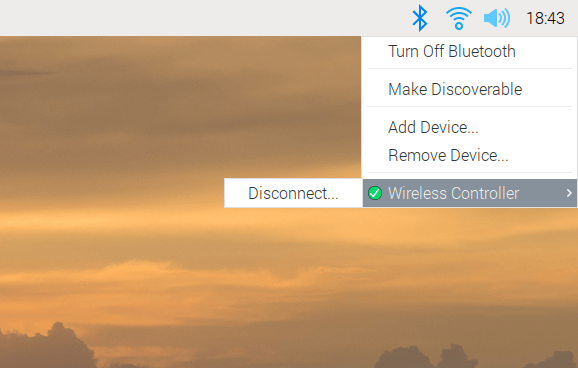
Done! It should take a second then you should see the following screen with your controller connected.
If the GUI method didn't work for you then try the bluetoothctl next
Problems connecting? Scroll down to the bottom of the page where I listed the problems I faced with solutions.
Using bluetoothctl to connect
bluetoothctl is a core Linux Bluetooth functionality and it's the best way to connect your controller if you faced issues or errors with the GUI method.
Open up your terminal and start up the tool by typing the command:
sudo bluetoothctlNow you're in the Bluetooth command line tool, run those commands to enable the bluetooth agent:
agent on
discoverable on
pairable on
default-agent
Then start scanning for devices. The terminal should start listing scan results with all the bluetooth devices around you so pay some attention to the output because we need to find the controller.
scan on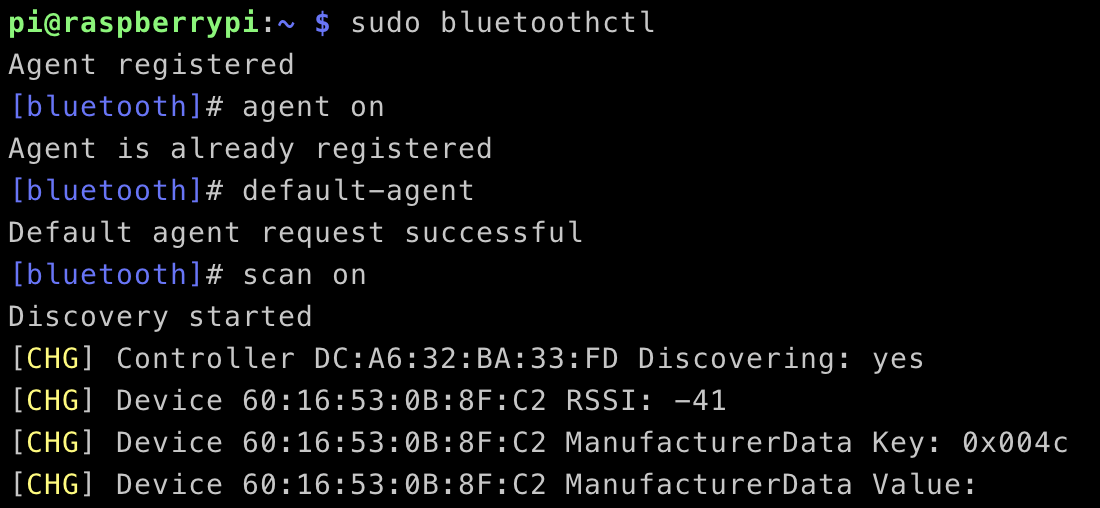
While the command tool is scanning, press and hold both your Share and PS buttons on your controller. Keep holding the buttons at the same time until your controller starts flashing light.
Remember, the command tool is still scanning and your controller just entered pairing mode so you should very soon see a new record on your terminal showing the MAC address of the controller.
[NEW] Device AC:FD:93:14:25:D3 Wireless ControllerIn my case, the MAC address is AC:FD:93:14:25:D3
As soon as you see the Wireless Controller MAC address on the terminal, make sure your controller is still flashing (if it's no longer flashing press Share and PS buttons again)
While it's still flashing type in the command to connect and make sure you replace CONTROLLER_MAC_ADDRESS with your own address. Again, in my case my MAC address is AC:FD:93:14:25:D3 so yours might be different
connect CONTROLLER_MAC_ADDRESSDone. If everything went well you should see a connection successful message appear on your terminal like so
Attempting to connect to AC:FD:93:14:25:D3
[CHG] Device AC:FD:93:14:25:D3 Connected: yes
[CHG] Device AC:FD:93:14:25:D3 ServicesResolved: yes
[CHG] Device AC:FD:93:14:25:D3 Paired: yes
Connection successful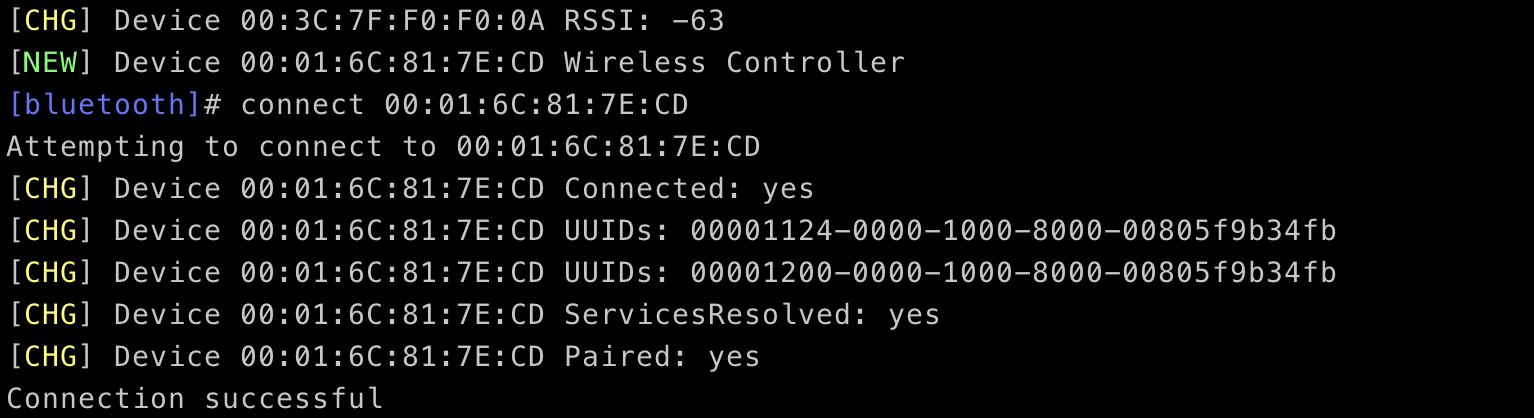
Next, we need to add this newly paired bluetooth device to the trusted list so next time the PS4 controller can automatically connect the Raspberry Pi. Type in the command:
trust CONTROLLER_MAC_ADDRESSDONE! Your controller should be connected, paired and trusted.
USB cable connection
This is the easiest way to connect your controller but the controller needs to be wired to the Pi.
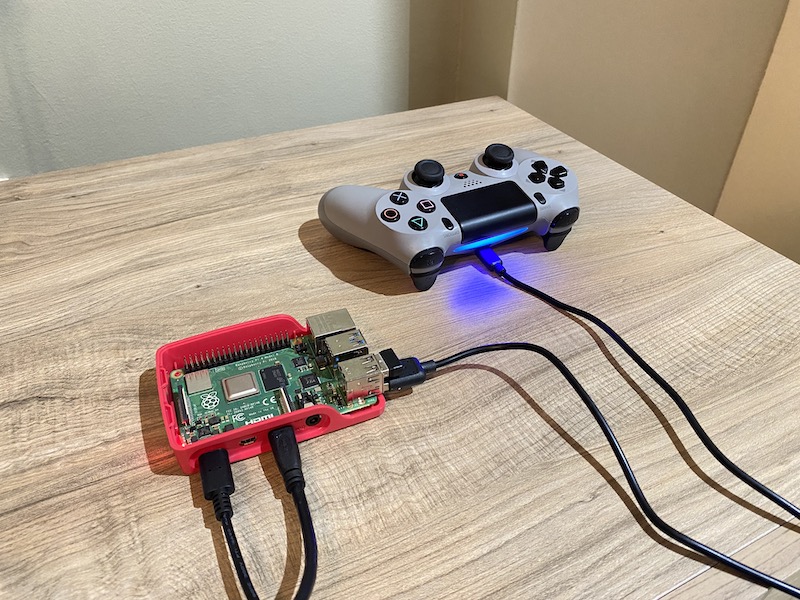
Plug a micro USB into your controller and connect it to one of the Raspberry Pi USB ports.
Your controller should lit a blue light meaning it's successfully connected and it's ready to use.